How to Use a Manual Capsule Filling Machine: A Step-by-Step Guide
A manual capsule filling machine helps you easily pack powders (such as nutritional powders, herbal extracts, and dietary supplements) into compatible empty hollow capsules ranging in size from 000 to 5. The entire process is typically completed using a structured tray-based system.
Using the device involves preparing the filling board and matching capsules, loading the capsule bodies into the plate, distributing the powder, tamping it down securely, placing the capsule caps, locking them together, and inspecting the final product.
This comprehensive guide walks you through every step of using a manual capsule filling machine, including equipment preparation, capsule loading, powder distribution, tamping, locking, cleaning, and basic troubleshooting.
This guide focuses on standard tray-type manual capsule fillers designed for powder applications. Layouts, orientation, and locking mechanisms may vary by model. Always refer to your specific machine manufacturer’s instruction manual before operation.
Quick Overview: How to Fill Capsules Manually
The basic operational workflow consists of: Preparation -> Loading -> Filling -> Tamping -> Locking -> Inspection
Before starting, confirm that your machine supports the capsule size and shell type you intend to use.
What You Need Before You Begin
Before setting up your manual capsule filling machine, gather the following items:
- One manual capsule filling machine.
- Empty hard-shell capsules compatible with your machine board.
- Sufficient powder for filling.
- The matching powder spreader, tamping tool (press powder board), and spill guard included with the filler.
- A clean, dry workbench and a suitable collection tray.
- Measuring equipment and personal protective equipment (PPE) as needed.
Keep your work area clean and free of clutter. If your powder generates airborne dust, follow appropriate handling, safety, and ventilation guidelines.
This guide covers machinery operation only and does not involve the selection of medical or dietary supplement ingredients, nor does it determine appropriate dosages. For pharmaceutical products, comply with all applicable professional standards, regulations, and formulation guidelines.
Confirming Capsule Size and Machine Compatibility
Before purchasing empty capsules, check your machine product specifications or user manual.
Capsule sizes are typically designated by numbers such as 000, 00, 0, 1, 2, 3, 4, and 5. However, compatibility depends entirely on your filling plate dimensions and matching molds.
Please verify the following points:
- The capsule size matches the designated specifications of the machine.
- The capsule shell type is fully compatible with the equipment.
- Both capsule bodies and caps fit correctly into their respective positioning holes.
- If changing capsule sizes, verify whether the machine provides compatible replacement plates or accessories.
Never force incompatible capsules into the filling board. Mismatched sizing can cause poor alignment, damaged shells, or closure failures.
Understanding the Parts of a Manual Capsule Filling Machine
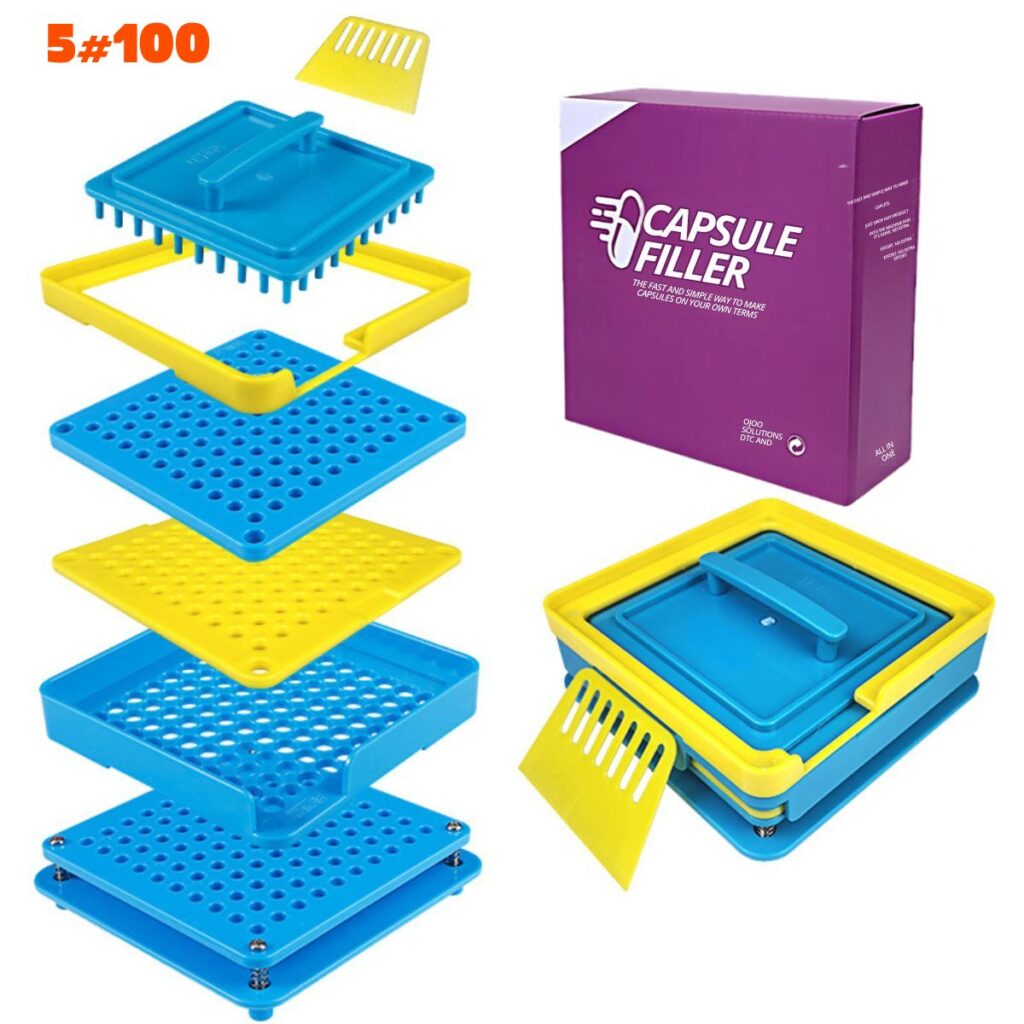
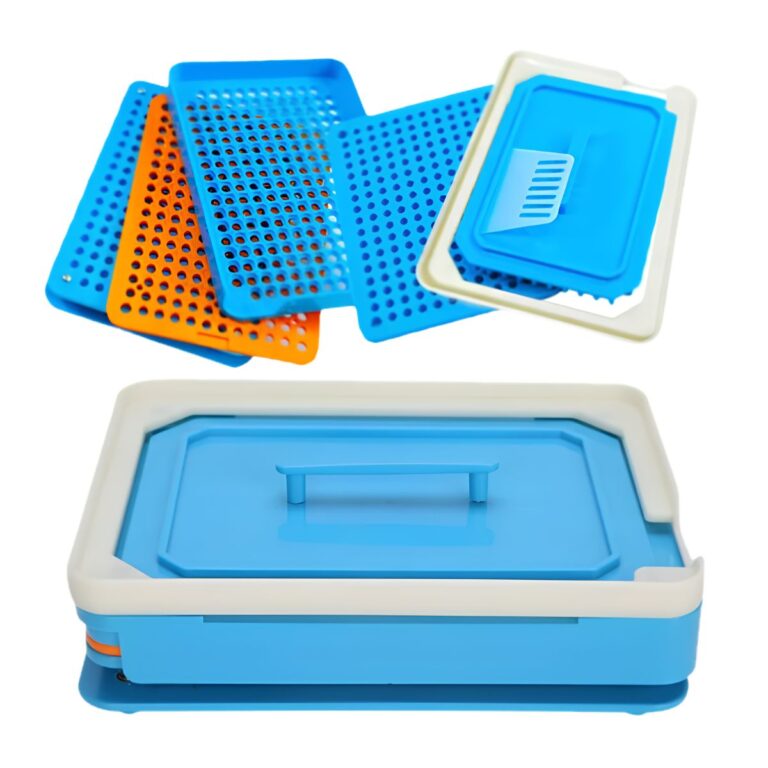
Before operating the machine, familiarize yourself with the primary components. A standard tray-type manual capsule filling machine typically includes the following parts:
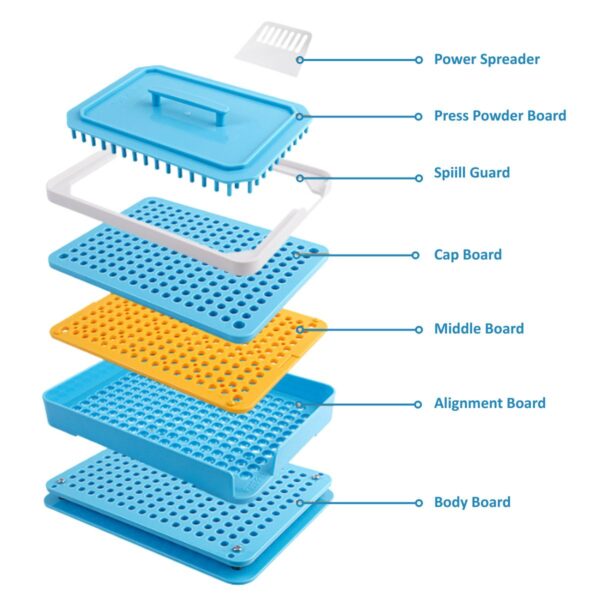
| Component Name | Description & Function |
| Body Board | The bottom template used to hold and position the capsule bodies. |
| Alignment Board | Used to neatly align and distribute capsules into position. |
| Middle Board | The transition component connecting the body and cap sections. |
| Cap Board | The upper template designed to hold and position capsule caps. |
| Spill Guard (Stopper Plate) | A perimeter frame placed around the filling plate to prevent powder from spilling during spreading. |
| Press Powder Board (Tamping Tool) | A tool with tamping pins designed to evenly compact powder inside the capsule bodies. |
| Powder Spreader (Scraper) | Used to evenly distribute and push powder into the open capsule bodies. |
Step-by-Step Instructions: How to Operate the Machine
The following steps outline a common tray-type operational workflow. If your machine utilizes a different sequence or mechanism, follow your specific model instruction manual.
Step 1: Assemble the Machine and Prepare Empty Capsules
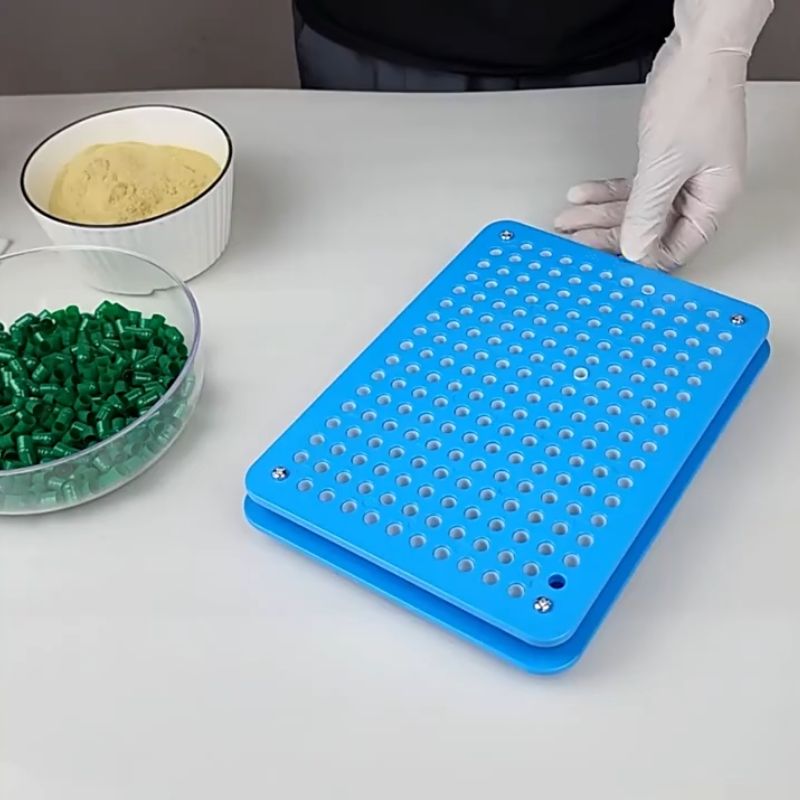
Place the device on a stable, level workbench and set up the filling plates, stands, and accessories according to the manual. First, identify the two parts of an empty capsule:
- Capsule Body: The longer section designed to hold the filling material.
- Capsule Cap: The shorter section used to seal the capsule body. Carefully separate the capsule bodies and caps before loading. Inspect the empty shells for cracks, deformation, or visible damage. Pre-operation check: Confirm that the machine is assembled correctly, the capsule shells are undamaged, and everything is compatible.
Step 2: Place Capsule Bodies into the Body Board
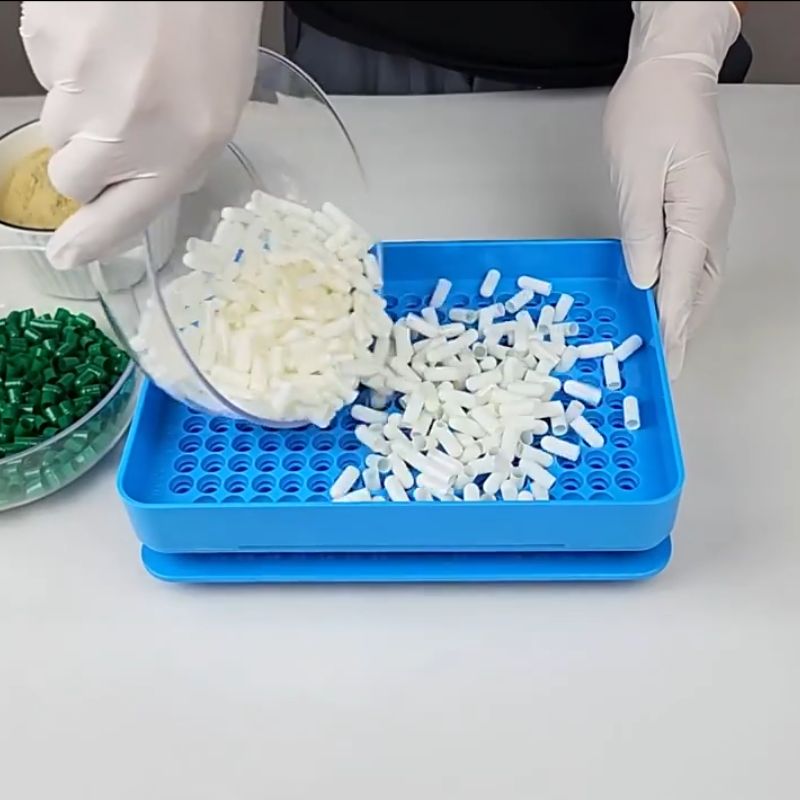
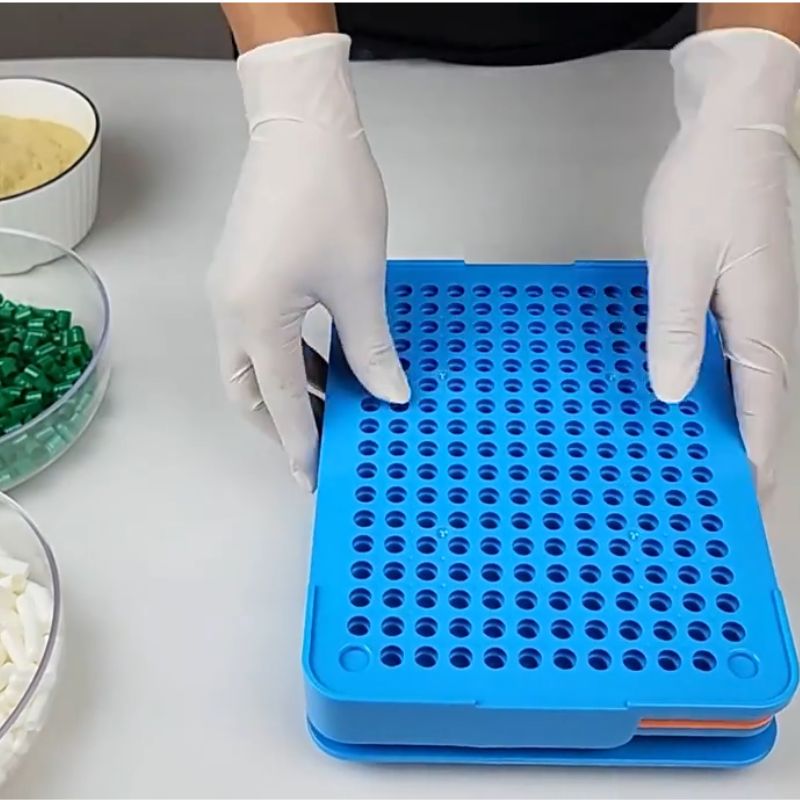
Insert the capsule bodies into the designated filling board. Arrange the capsules in the orientation specified by the manufacturer. Capsule bodies should sit securely within their respective holes without tilting, jamming, or requiring forced insertion. Before adding powder, inspect the filling plate:
- All required holes are filled with capsule bodies.
- There are no inverted or severely misaligned capsules.
- Capsule bodies sit at the expected insertion depth.
- No damaged capsule fragments remain in the work area. If capsules do not fit properly, check the size, orientation, and plate installation. Forcing them may damage the shells or equipment.
Step 3: Add and Distribute Powder
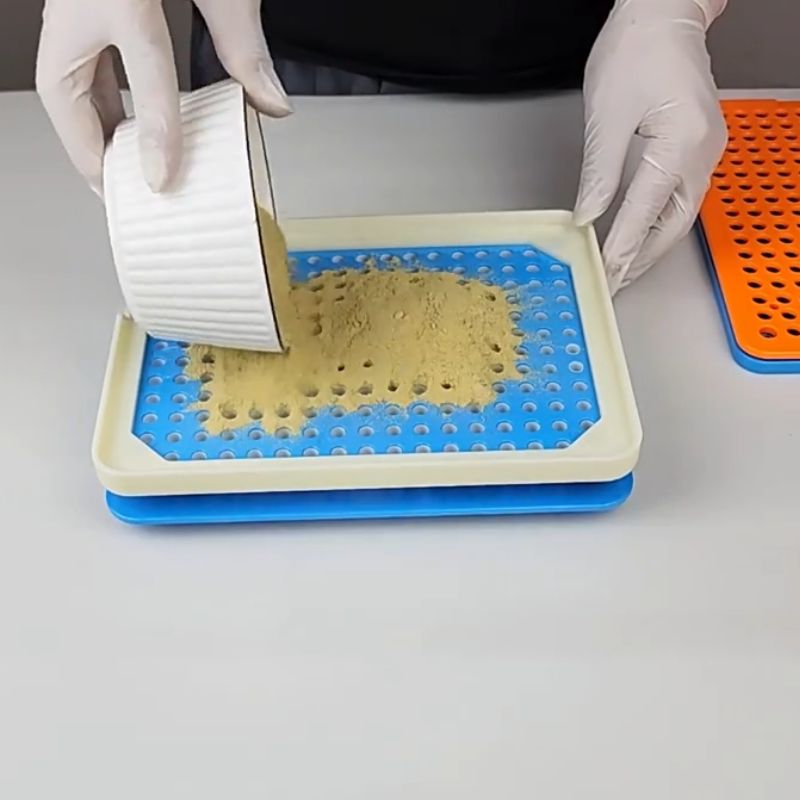
If your machine includes a spill guard or perimeter frame, install it as directed. Gradually pour the prepared powder onto the filling plate, then use the matching powder spreader to sweep the powder evenly across the open capsule bodies. Minimize powder spills during operation to avoid excessive airborne dust. If handling hazardous, irritating, or inhalation-sensitive materials, strictly follow appropriate safety protocols. Multiple controlled spreading passes may be required to achieve full coverage across the plate. Before moving to the next step, clear excess powder from around the work area. Expected result: Powder is evenly distributed into all capsule bodies with no unfilled gaps.
Step 4: Tamp the Powder and Top Up if Necessary
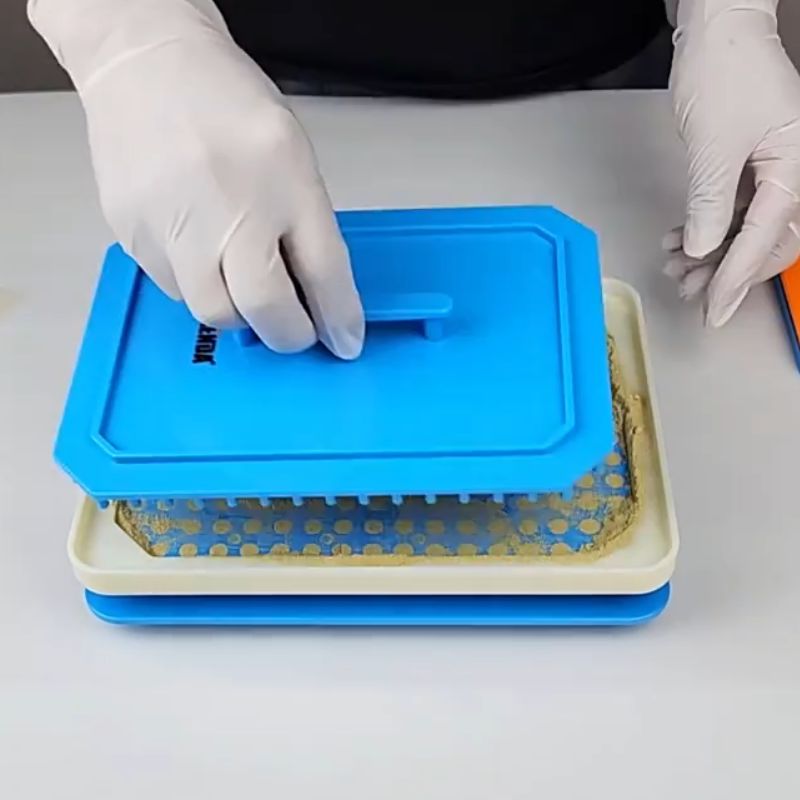
Use the press powder board (tamping tool) to apply steady, controlled pressure to compact the powder inside the capsule bodies. Do not force the tamping tool violently into the plate. Note: Tamping alters how powder packs inside the capsule, but it does not determine exact dosage accuracy or guarantee uniform weight and active ingredient consistency across every single capsule. Pre-operation check: Confirm that the filling process follows machine guidelines and that neither the capsules nor the filling board are damaged.
Step 5: Load and Position Capsule Caps
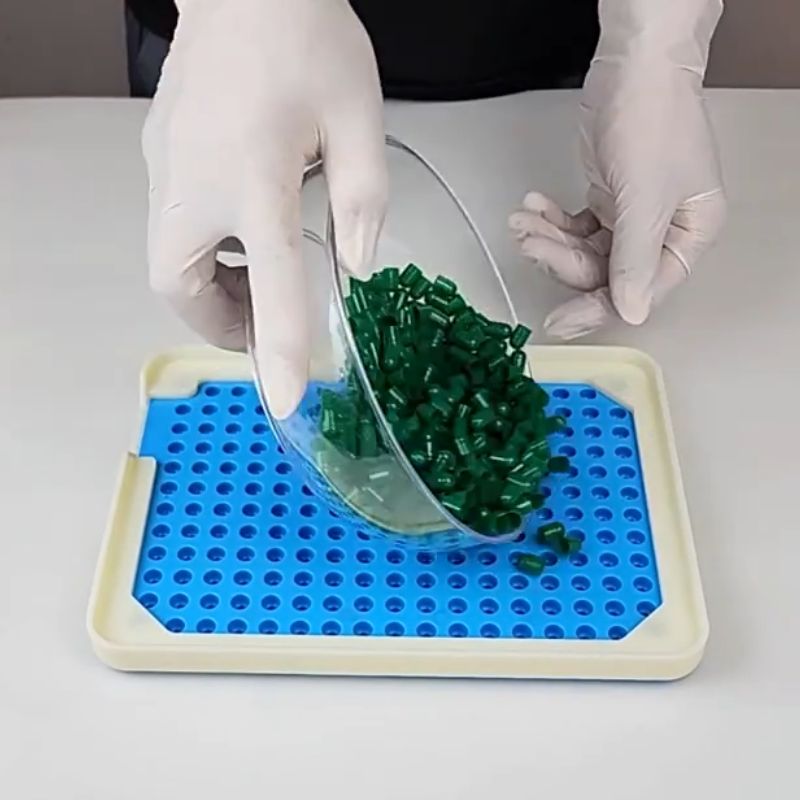
Using the matching cap board, prepare and position the capsule caps. Place each cap into its correct position. Verify that the caps face the correct direction and align accurately with the corresponding capsule bodies. Expected result: Capsule caps are correctly positioned and ready for closure.
Step 6: Connect and Lock the Capsules
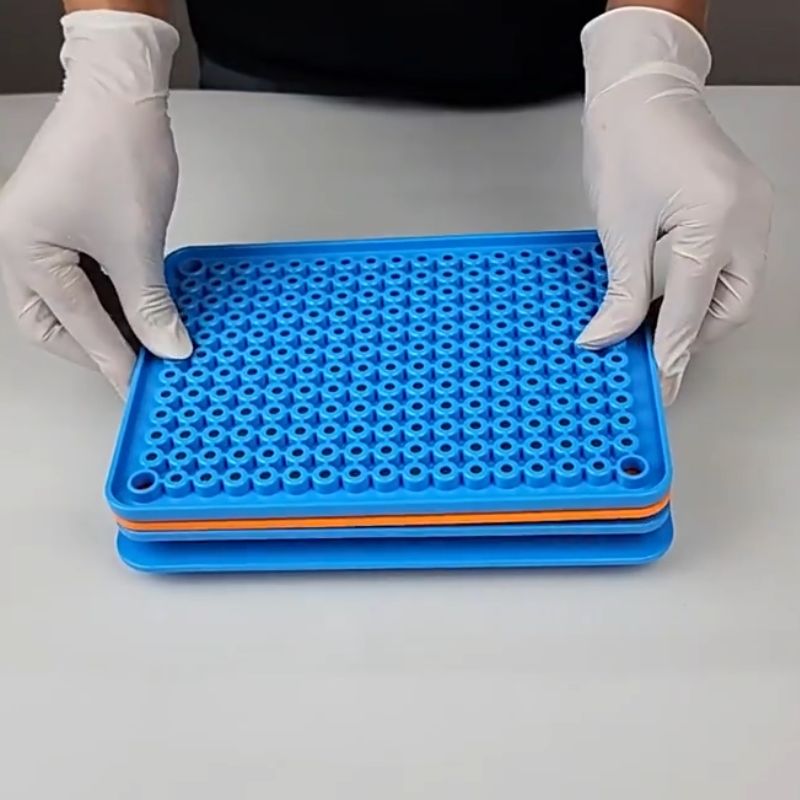
Align the capsule cap assembly framework with the body positioning plate. Use the machine’s built-in pressing, connecting, or locking mechanism to join the two capsule halves together. Operate the locking mechanism using the motion and pressure recommended by the manufacturer. If the plate resists movement or capsules fail to close smoothly, do not apply excessive force. If closure is difficult, stop immediately and check for these issues:
- Capsule bodies and caps are misaligned.
- Capsules are not seated correctly in their positioning slots.
- Powder residue is trapped in the locking areas.
- Capsule shells are damaged.
- Filling plates are misaligned or assembled incorrectly. Identify and resolve the issue before trying again. Closure methods vary significantly between machines; do not assume all models use the same lever action or press depth. Expected result: Capsule bodies and caps are securely connected according to design specifications without visible shell damage.
Step 7: Remove and Inspect Filled Capsules
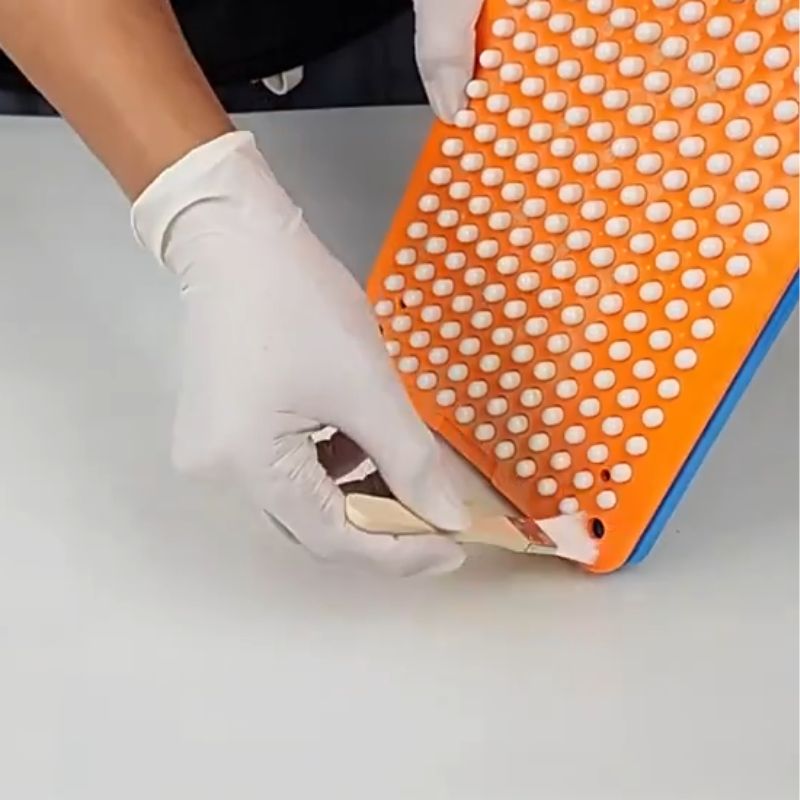
Release the completed capsules using the manufacturer’s specified extraction method and transfer them into a clean collection tray. Inspect the capsules for visible physical defects, including:
- Loose or incompletely snapped capsule caps.
- Cracked or deformed capsule shells.
- Powder leakage around the joint seams.
- Incomplete capsule closure. Set aside any defective capsules for further investigation rather than attempting to force-reclose them without identifying the root cause.
Watch the Video: How to Use a Manual Capsule Filling Machine in Action
If you prefer a visual demonstration, watch our step-by-step video guide below to see the entire capsule filling process in real time.
Seeing the machine in action makes it even easier to master capsule preparation, powder distribution, tamping, and final locking. Be sure to subscribe for more helpful tutorials, DIY supplement tips, and equipment guides.
Troubleshooting Common Issues
If your manual capsule filling machine fails to operate smoothly, stop and inspect the device immediately rather than forcing extra pressure.
| Common Issue | Possible Causes | Solution |
| Capsule bodies will not fit into the filling board | Size mismatch, wrong orientation, or incompatible accessories. | Verify capsule size and ensure correct placement orientation. |
| Uneven powder distribution | Insufficient spreading, difficult material characteristics, or incorrect spreader placement. | Check spreader placement and sweep powder using standardized motions. |
| Capsule caps fail to align properly | Improper loading or incorrect plate positioning. | Recheck cap orientation and machine alignment workflow. |
| Capsules fail to close | Misalignment between sections, trapped powder residue, or incorrect assembly. | Stop operation, realign components, and clear obstructions safely. |
| Cracked capsule shells | Damaged shells, incompatible tools, or excessive force. | Inspect shells and accessories; never force the locking mechanism. |
| Powder leakage from closed capsules | Incomplete closure, damaged shells, or poor component fit. | Check connection seams, shell condition, and device compatibility. |
These are common potential causes and do not constitute a definitive diagnostic report. If problems persist, consult your manufacturer manual or contact your equipment supplier. Do not modify the machine structure yourself.
How to Clean and Dry Your Manual Capsule Filling Machine
Clean the machine thoroughly after every use. If your materials or operational standards require extra sanitation, follow those specific protocols.
- Remove residual powder using cleaning methods appropriate for your machine materials.
- Disassemble removable parts strictly according to manufacturer instructions.
- Clean filling plates, frames, spreaders, and tamping tools using designated cleaning agents.
- Allow all components to air-dry completely using approved methods.
- Inspect all parts for residue, damage, or wear before reassembly.
Never assume machine parts are dishwasher safe, and avoid unauthorized soaking, harsh solvents, or high-heat cleaning. These methods can warp or ruin specific materials and components.
If the equipment is used for pharmaceuticals or other regulated materials, comply with all applicable cleaning, contamination control, and record-keeping requirements.
Frequently Asked Questions (FAQ)
Related Products
-
Manual Capsule Filling Machine – Size 5 (100-Hole)
Original price was: $79.00.$59.90Current price is: $59.90.